INTRODUCTION
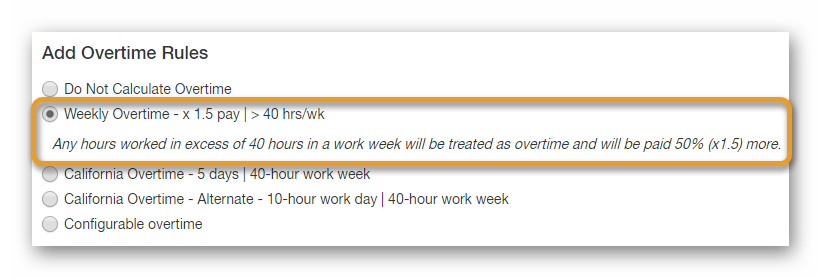
By default, the Payroll Report includes four different predefined overtime calculation options. If one of the options is selected, and you generate the Payroll Report, the overtime calculation you selected will be applied to all of the staff members you've included in the report. You can of course generate a number of separate payroll reports, each with a different overtime calculation, but what if you wanted to generate a single Payroll Report that calculates overtime differently for each staff member? This is where Employment Rules come into play.
CONFIGURATION
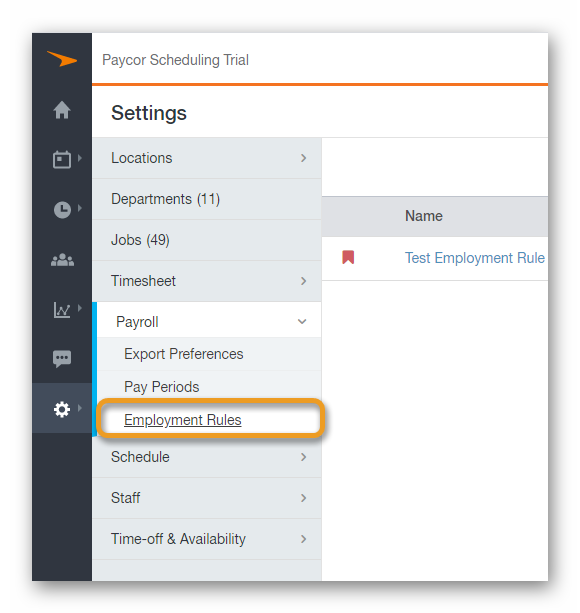
Let's head over to the Employment Rules page, and create an Employment Rule. Hover over the Settings tab (gear icon), click the Payroll button, then the Employment Rules button.
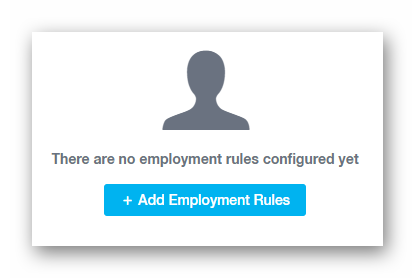
If you do not have any Employment Rules created within your account, simply click the + Add Employment Rules button in the middle of the page to get started. If you do have an Employment Rule(s) created within the account, the button to create a new Employment Rule will be the same, but it will be in the upper right hand corner of the page.
Let's start by giving the new Employment Rule a name. You can also decide if this should be the default Employment Rule automatically assigned to newly created staff members.
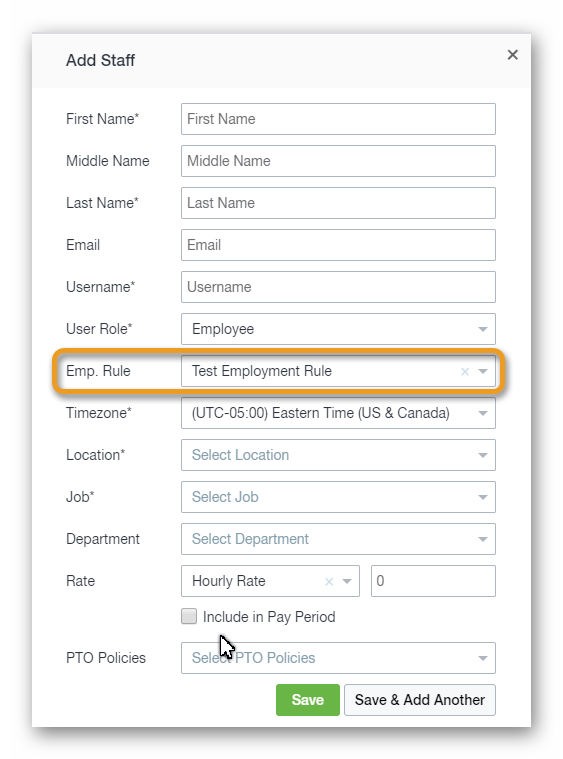
If you do enable the Default Employment Rule option, when you are creating a new staff member, the Emp. Rule field will automatically select the Default Employment Rule.
When an Employment Rule has been marked as a Default Employment Rule, a red flag will be displayed to the far left of the Employment Rule on the Employment Rules page.
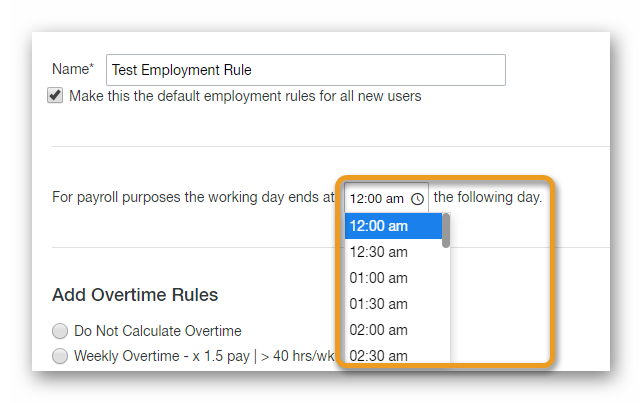
For payroll purposes, if you want to change the time that the working day ends on the following day, you can change that directly below where you named the Employment Rule.
Next, we have the Add Overtime Rules column. This is where you will decide how Employment Rule overtime is calculated. Selecting any of the options will display a description of the Overtime Rule.
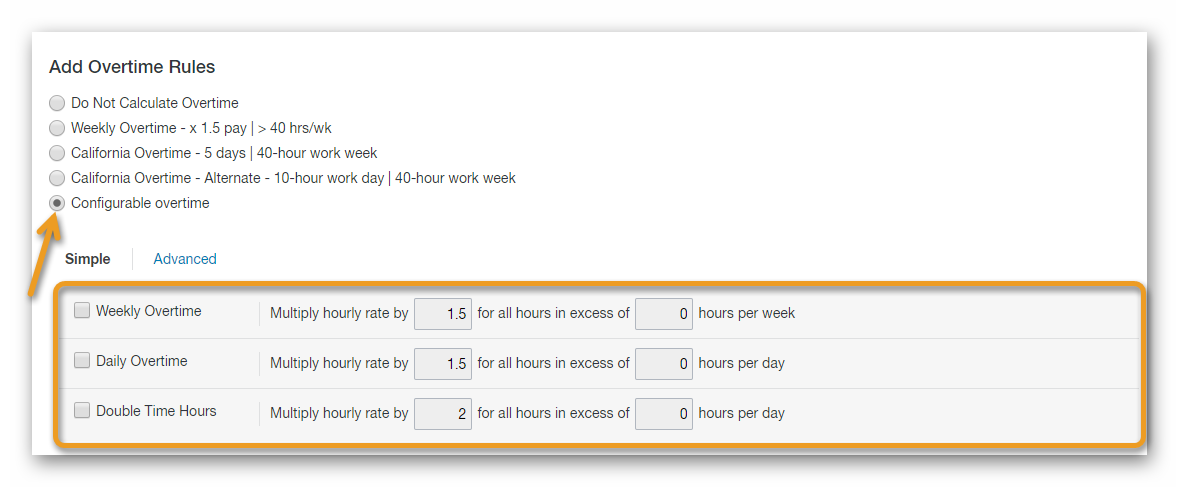
If the predefined Overtime Rules do not apply to the Employment Rule being created, then you have the option to configure your own Overtime Rule. Select the Configurable Overtime option at the bottom of the list so you can interact with panel below.
Additionally, you have the option to select the 'SIMPLE' or 'ADVANCED' Employment Rules.
SIMPLE
With Configurable Overtime (Simple), you can define your own customized Overtime Rule for Weekly, Daily, and Daily Double parameters. Click the checkbox to enable each row.
ADVANCED
With Configurable Overtime (Advanced), you are able to further customize Overtime Rules and align the OT rules with your companies OT policies. The first step is to select 'Multiply with' or 'Flat Rate' option from the drop-down. When selecting either of the two options, a new 'rate' field will appear. The value in the 'rate' field (which is by default 0.0), will work in-parallel with the option enabled (Multiply with or Flat Rate).
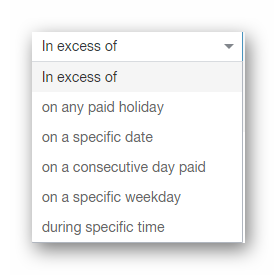
Selecting 'Multiply with' will enable the following fields in the drop-down next to 'any hours worked':
In excess of: This option will give you the ability to customize an OT rule based on the amount of hours worked (approved Time sheets) and assign it to a custom Pay Code, or create your own on the page. You are able to select the option per day, or per week. (i.e. Multiply the pay rate by 2 if employee works > 8 hours per day, or 40 hours per week.)
On any paid holiday: Enabling this option will use the multiplier to calculate the shift differential for hours that are worked on Holidays that are defined within Settings > Time-off & Availability. (i.e. Christmas, Martin Luther King Day, New Years Day)
On a specific date: This option will calculate shift differential for hours worked on a specific date. (i.e. I'd like for my employees to be paid double on this particular Sunday)
On a consecutive day paid: Consecutive days are also an option with custom configuration. This option will allow you to create a custom Overtime rule for an amount of hours worked after a particular number of consecutive days. Additionally, you're able to assign these hours to a new or existing Pay Code. (i.e. from below screenshot - (Employees that work 4 days consecutively, will receive x2 their pay rate after 6 hours worked on the 4th day.)
EXAMPLE: Staff member is working from Mon - Sun. Multiplier is set to '2' and employee pay rate is 10$/h. Work day is 8 hours.
Mon = 8 x $10 = 80$
Tue = 8 x $10 = 80$
Wed = 8 x $10 = 80$
Thu (4th Day) = 6 (after value) x $10 (pay rate) + 2 (hours) x 2 (multiplier) x $10(pay rate) = 100$
Fri = 6 (after value) x $10 (pay rate) + 2 (hours) x 2 (multiplier) x $10(pay rate) = 100$
Sat = 6 (after value) x $10 (pay rate) + 2 (hours) x 2 (multiplier) x $10(pay rate) = 100$
Sun = 6 (after value) x $10 (pay rate) + 2 (hours) x 2 (multiplier) x $10(pay rate) = 100$
On a specific weekday: With this feature, you have the ability to configure the shift differential for a certain day and time period. (i.e. Every Sunday any hours worked between 4.00 PM and 11.59 PM, pay rate will be x2).
During specific time: This shift differential option allows for the ability to set a differential for hours worked in the time interval set. (i.e. Any hours worked between 4.00 PM and 11.59 PM will be x2)
Selecting 'Flat Rate' will enable the following fields in the drop-down next to 'any hours worked':
All explanations regarding the fields in the drop-down for any hours worked for 'Flat Rate' mirror functionality to above (multiply with) highlighted options. The only addition being is that the 'Flat Rate' value will count toward calculation, instead of a multiplier.
Finally, within the ADVANCED options, you also have the ability to add additional Rules:
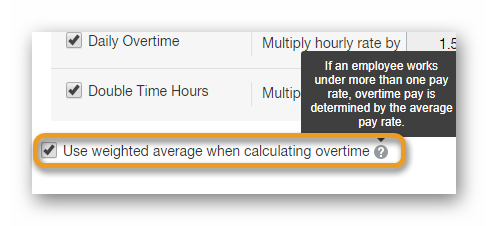
If staff members have more than one Pay Rate assigned, you may want to enable the Weighted Average option for the Employment Rule being created (this counts for SIMPLE and ADVANCED features). This will calculate the overtime pay based on the average of the combined pay rates.
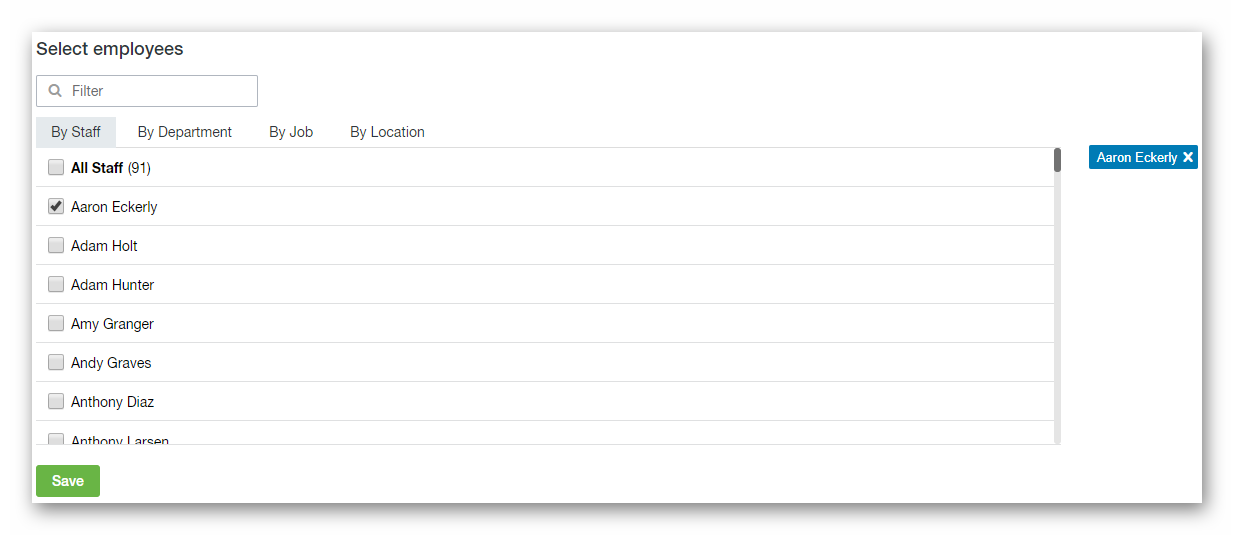
The final step here would be to assign staff members to the Employment Rule. There are a few filter options here to make things easier, and you can even search for staff members by entering their name into the search bar. Click the checkbox to the left of each staff member to add them to the Employment Rule, or click the All Staff checkbox to add all staff members to the Employment Rule. The number displayed to the right of the All Staff text is the number of staff members that will be added if the All Staff checkbox is clicked.
Staff members can be removed from the Employment Rule individually by clicking the small x's to the right of their names, or you can remove all staff members from the Employment Rule at once by clicking the Remove All button. The number displayed to the right of the Remove All button is the number of staff members that will be removed from the Employment Rule.
IMPORTANT NOTE: Keep in mind that you are not required to add staff members to the Employment Rule for it to be created. Simply click the Save button when you're comfortable with the configuration.
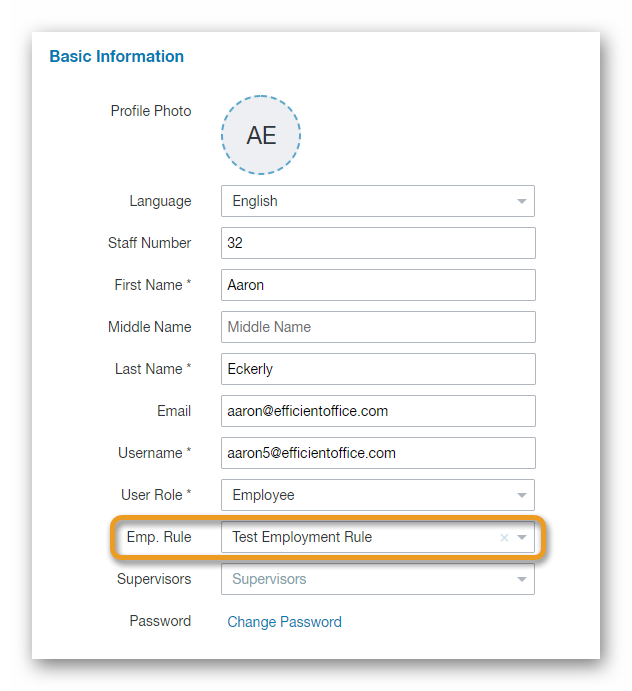
New staff members can of course be added to Employment Roles at the time of their creation, or you can do so via their Profile Details page. Click the Emp. Rule field to see a list of created Employment Rules. Select the Employment Rule that applies, then click the Save button.
If you're comfortable with the configuration of the Employment Rule being created, the last step would be to click the Save button at the bottom of the page.
FUNCTIONALITY
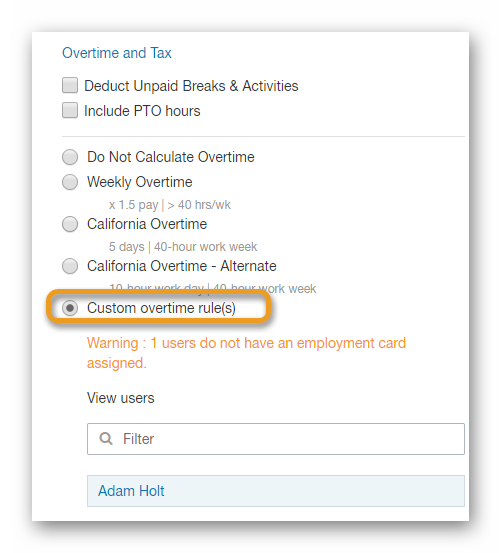
Let's head over to the Payroll Report page (for more information on the Payroll Report itself, click here). Configure the Payroll Report as necessary, and under Overtime and Tax, select the Custom Overtime Rule(s) option. Depending on the staff members being included in the report, some of the staff members in question may not be assigned to an Employment Rule. If this is the case, a warning will be displayed, and you will have the option to see who is not assigned to an Employment Rule.
Once the Payroll Report is generated, you will be presented with a number of columns with hours / overtime / wage data for each staff member you've included in the report.
Depending on the configuration of your Employment Rules, a number of different scenarios may occur. Below are some of the scenarios:
- If one of the staff members is assigned to an Employment Rule that does not calculate overtime, but another staff member is assigned to an Employment Rule that calculates Weekly / California overtime, the report will present you with columns that display overtime calculations for all staff members. However, the staff member who should not receive any overtime calculations will have empty values (0.00) in the overtime columns. The staff member who should receive overtime calculations will have values present in the column if they have accrued the hours.
- If a staff member is assigned to an Employment Rule that calculates weekly overtime, but another staff member is assigned to an Employment Rule that calculates California Overtime, then the report will display Double Time columns for all staff members. However, the first staff member mentioned will not have any values in the Double Time column (0.00), whereas the second staff member mentioned may indeed have Double Time hours present.
- If a staff member has not been assigned to an Employment Rule, but you included them in the report anyways, you will notice a warning icon under their name. Similar to the warning message presented prior to generating the report, this warning icon is simply to remind you that the staff member is not assigned to an Employment Rule.
__________________________________________________________________________________
We want to hear about your great ideas. If you have a feature request, enhancement suggestion, or improvement, let us know by submitting them to to our Ideas page. Your submission can receive votes from other Paycor Scheduling users, or you can vote on ideas yourself. Simply click the ADD A NEW IDEA button below to check it out.
Cheers!

