Please note: This article only applies to standalone customers. This article does not apply to those who are integrated into the broader Paycor HCM platform.
Note: These instructions are current as of May 27, 2021, and may not represent exact instructions as links or sites may change. Please contact us for more details if you are having difficulty with the setup.
Tip: These instructions apply to SSO only; you'll still need to manually provision and deprovision accounts in 7Geese.
- Step 1: Login to Office 365 as an admi
- Step 2: Click on ‘Admin’
- Step 3: On the navigation bar, find the entry for
Admin centersand expand it. Open the link to ‘Azure Active Directory’
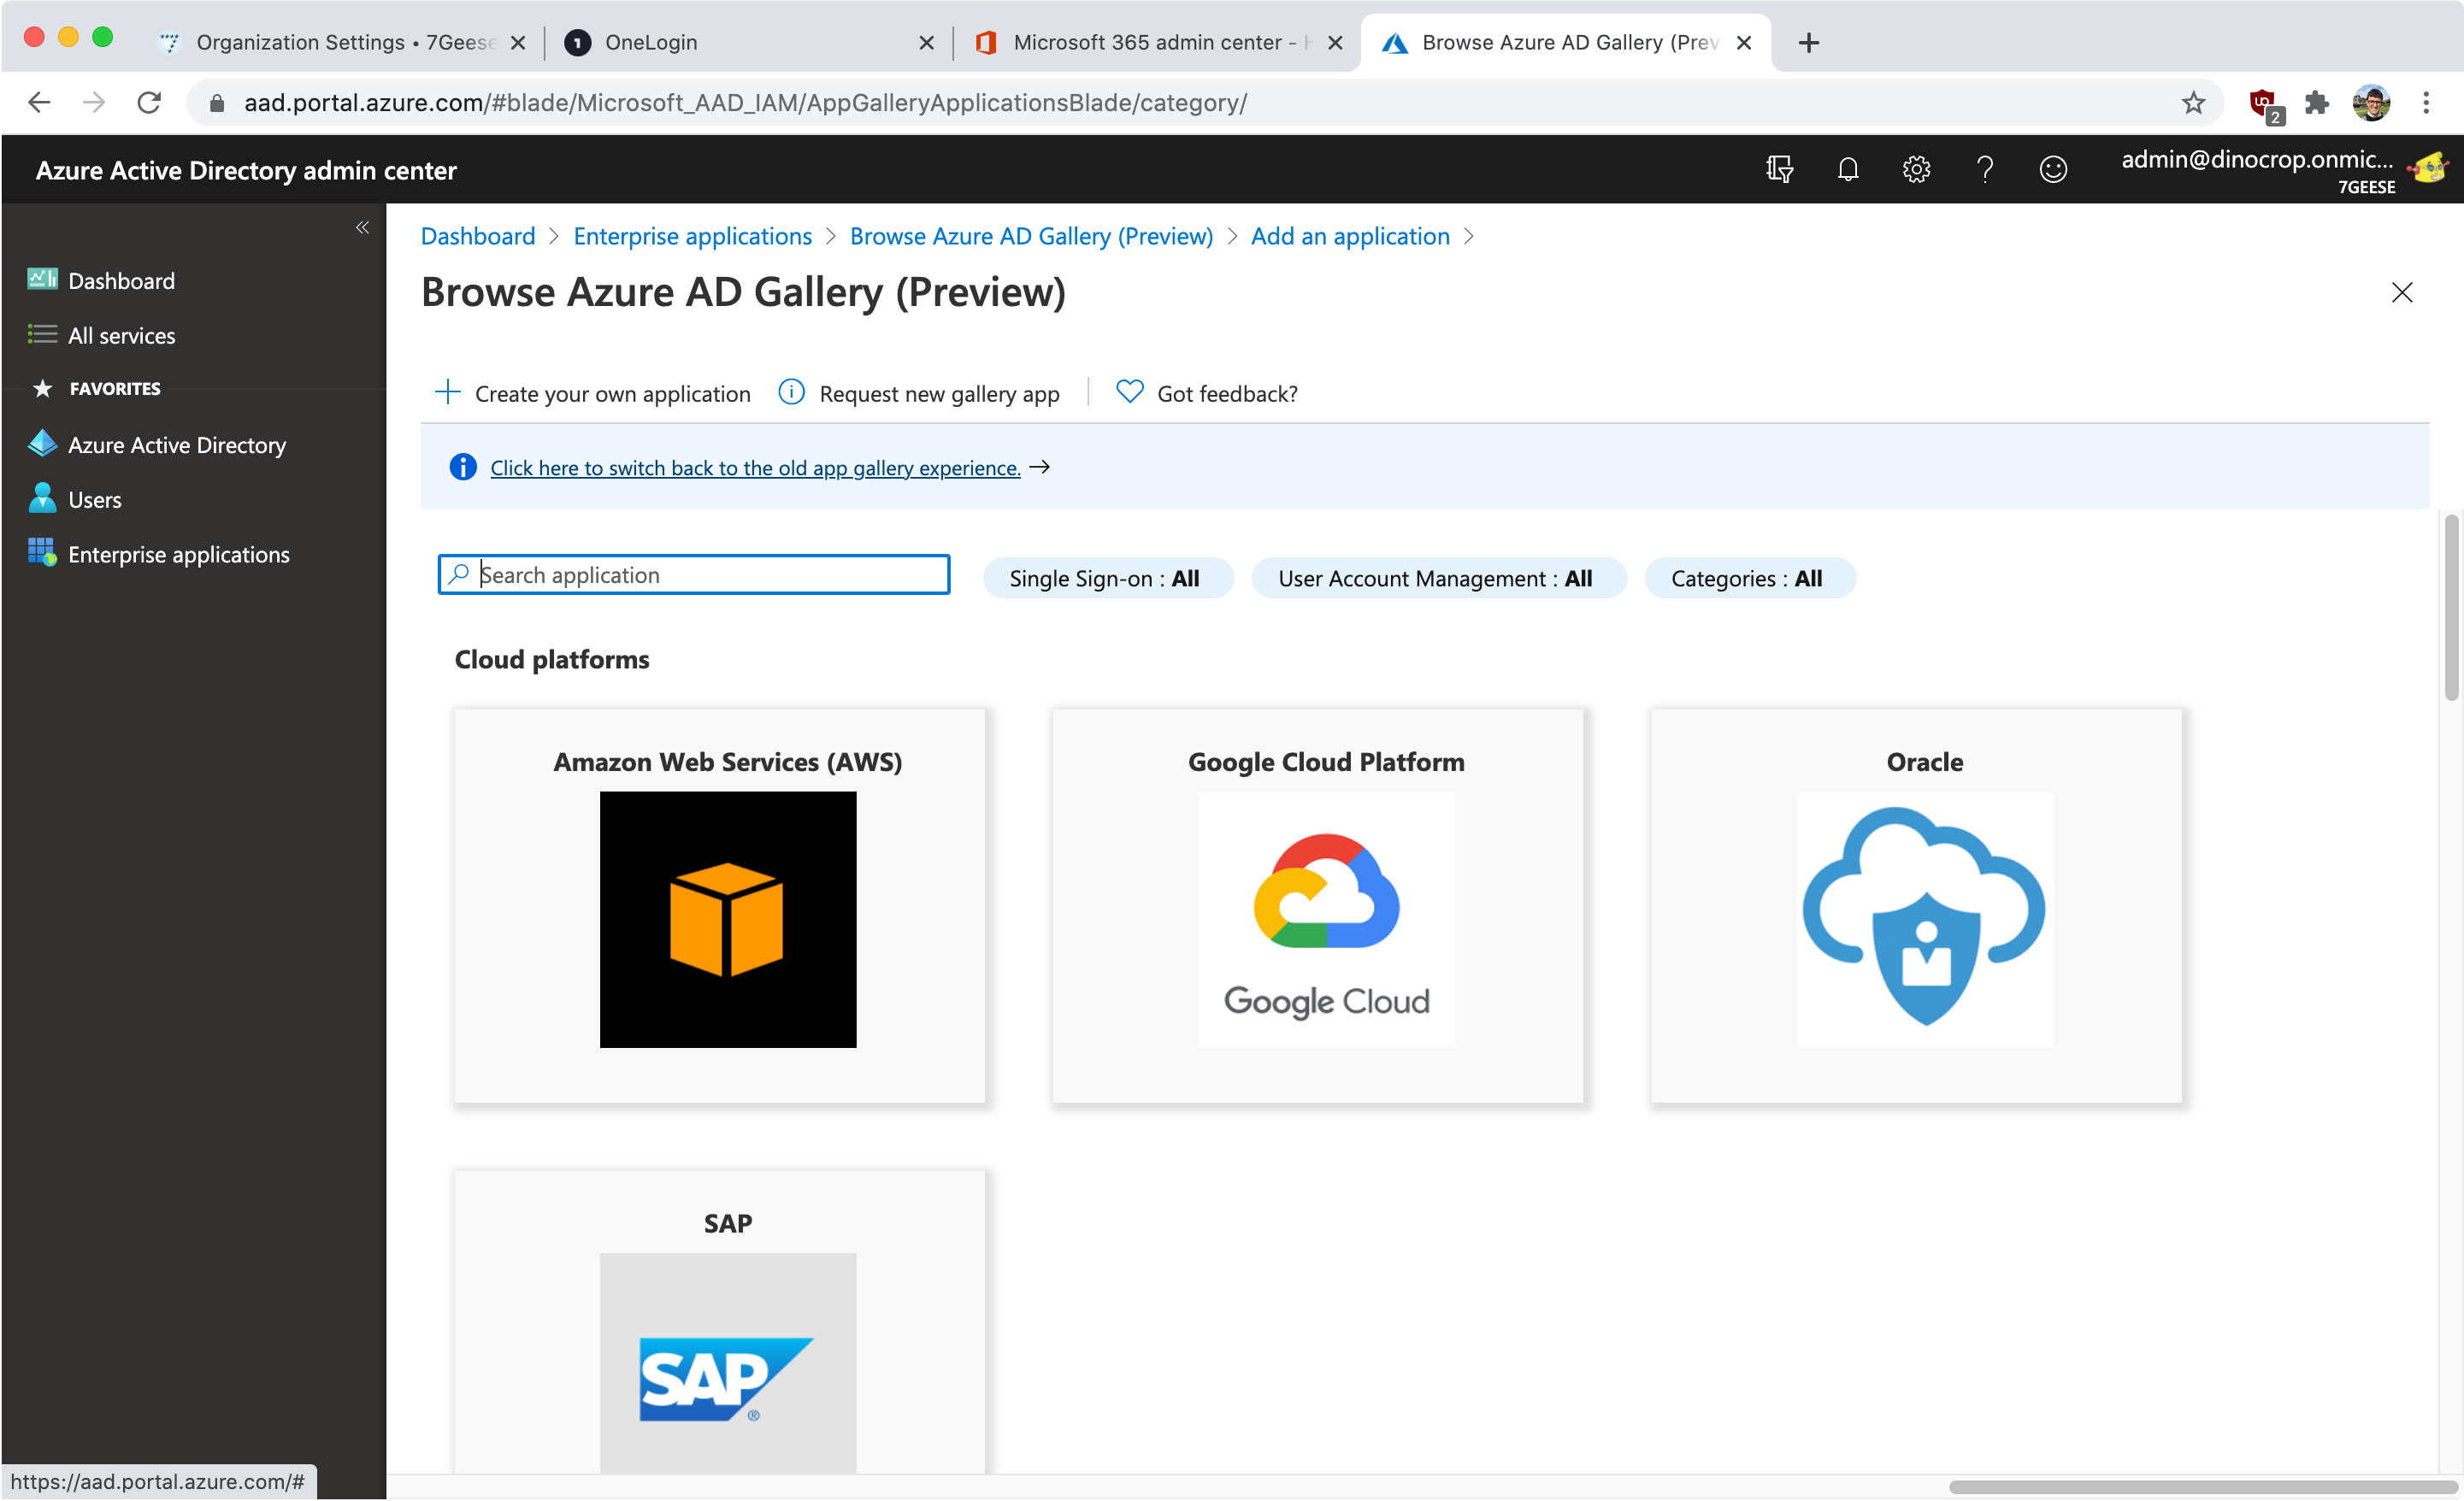
- Step 4: Click ‘Enterprise Applications’ from the navigation bar.
- Step 5: From the ‘All Applications’ pane, click ‘+ New application’
- Step 6: Click ‘Non-Gallery Application’.
Note: It may be helpful during setup to go to the Enterprise applications on Azure AD portal and click a link that says 'Click here to switch back to the old app gallery experience.' There you can start the 'Non-gallery application' workflow.
- Step 7: At this point you might be prompted to sign up for a service to enable SAML through active directory. Azure Professional Tier 2 is sufficient and available for a trial period of one month with 100 users.
- Step 8: Name the application 7Geese and and click create to continue the setup.
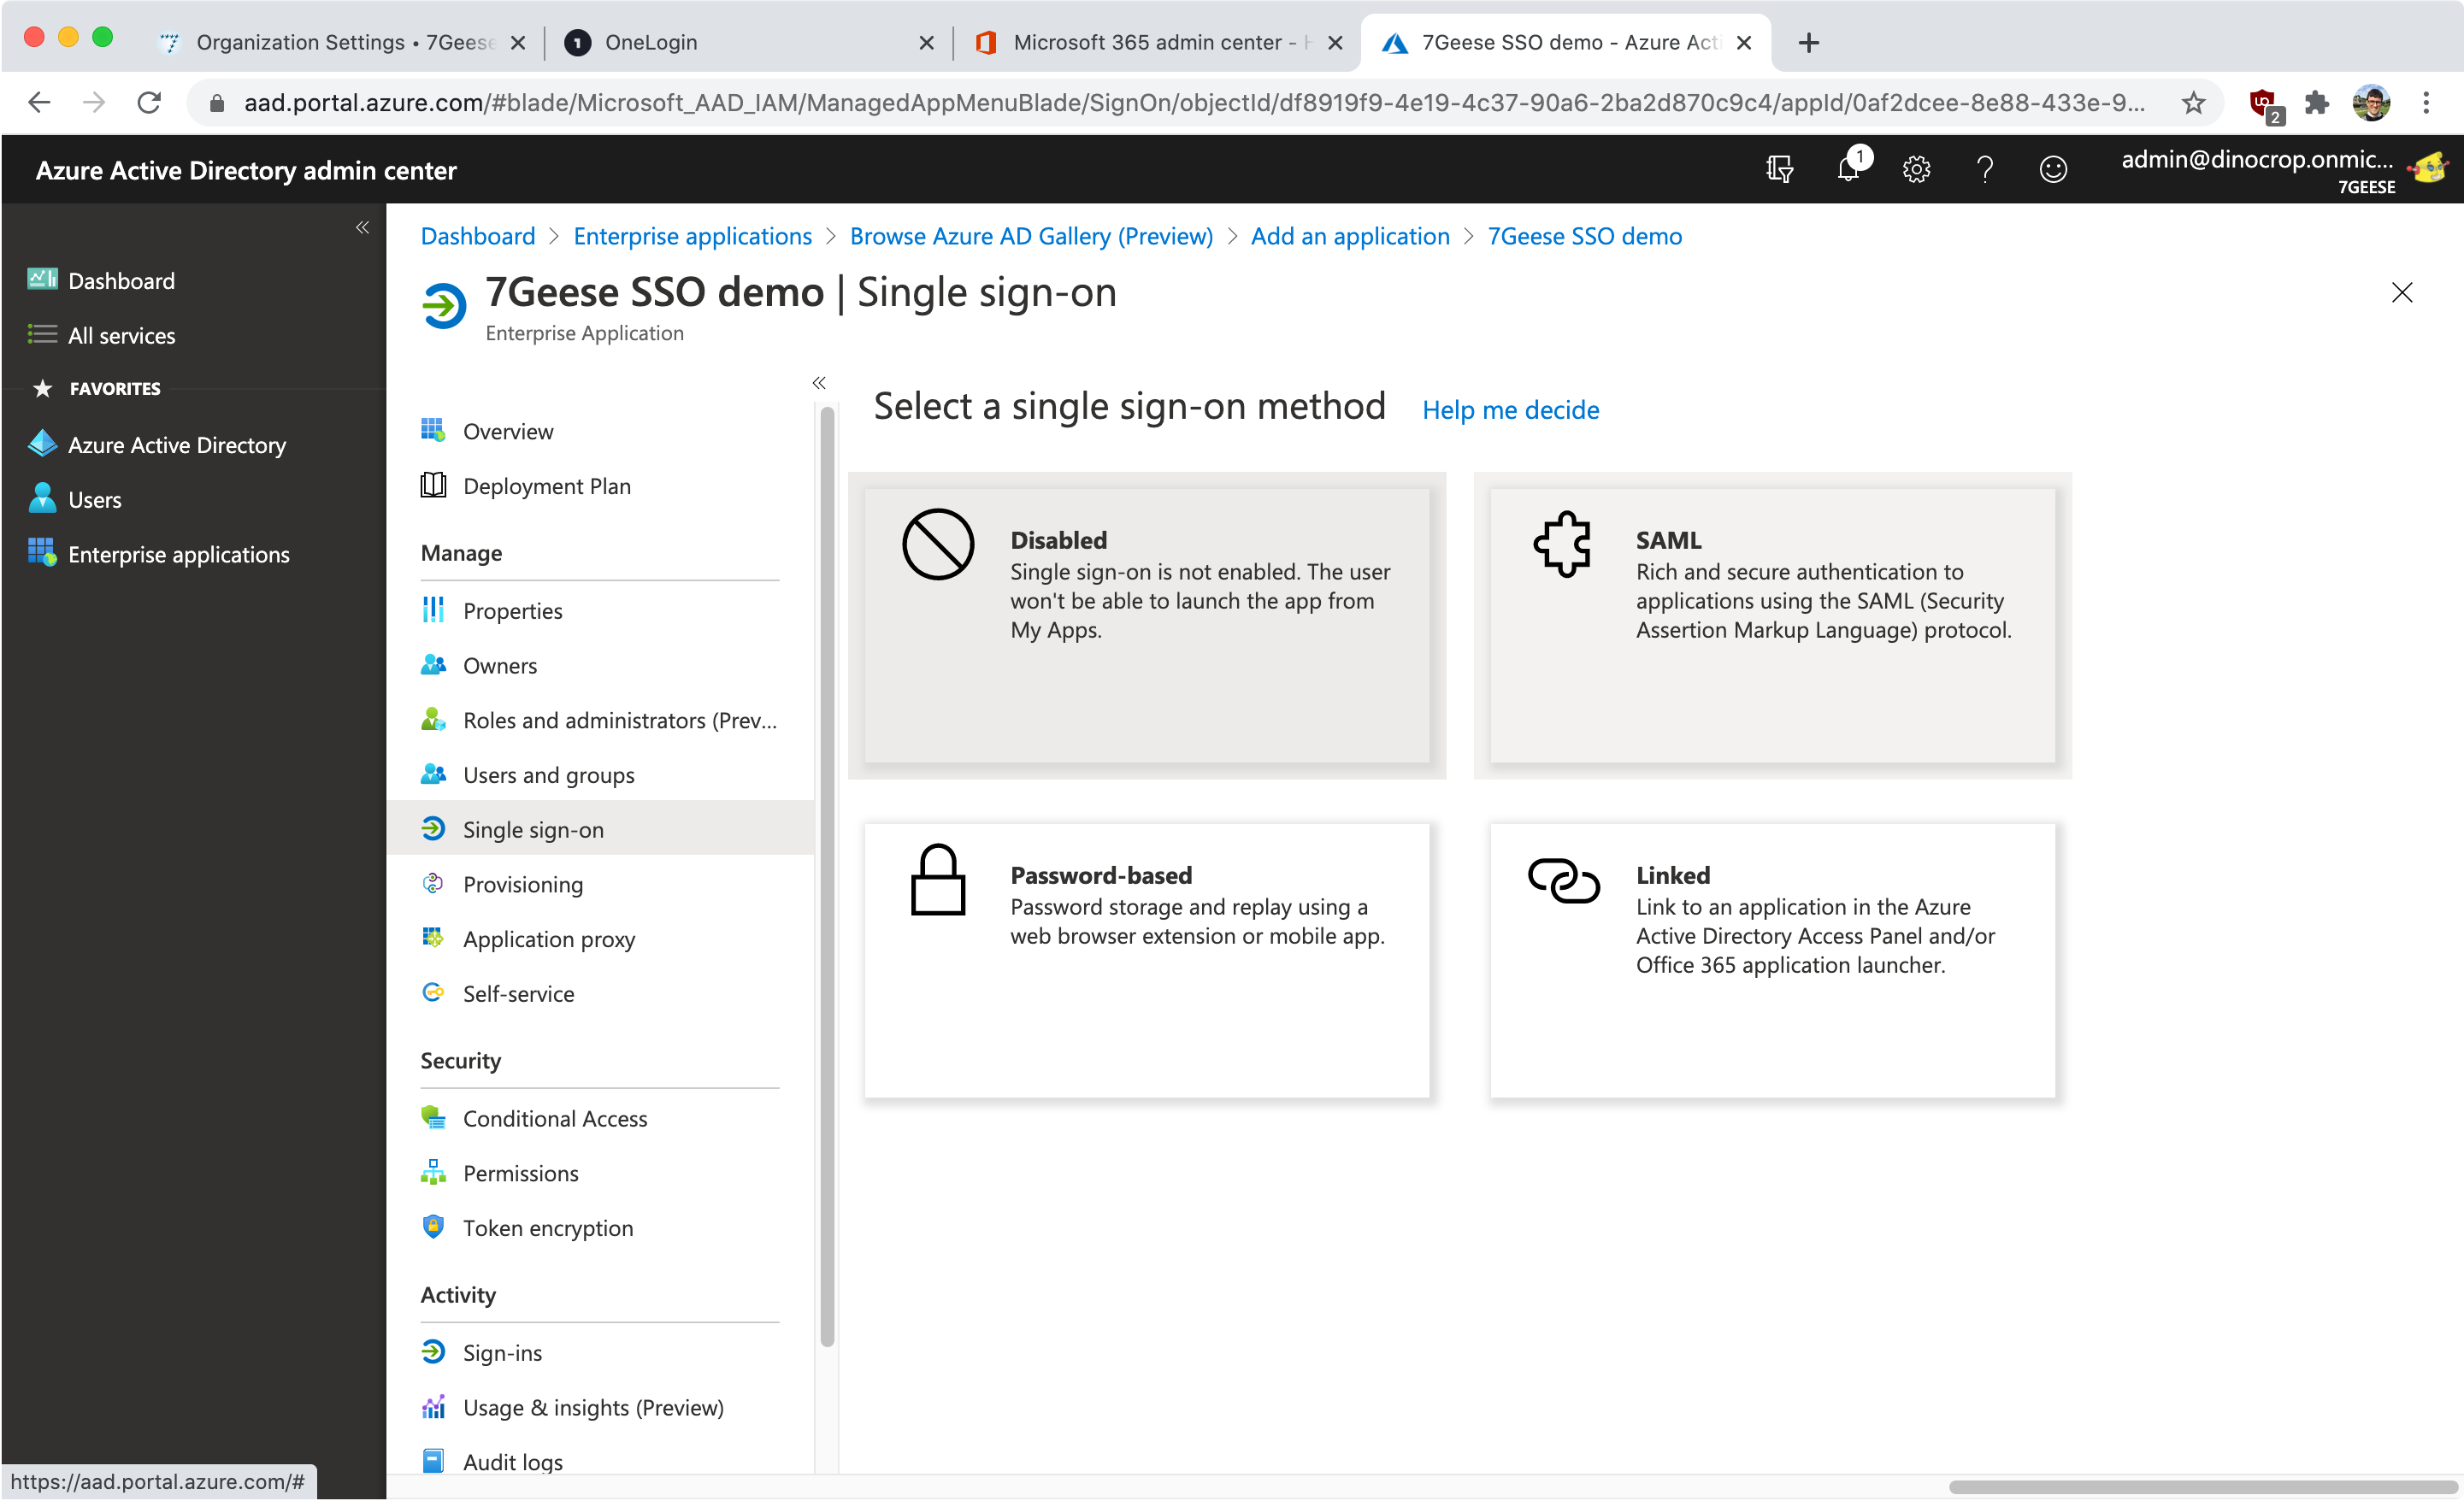
- Step 9: From the ‘Single Sign-on’ panel, select ‘SAML-based Sign-on’ from the drop down selector.
- Step 10: From near the bottom of the page, download the generated certificate in base64 mode.
- Step 11: Click ‘Configure 7Geese’, from the bottom of the page, a new page will open up.
- Step 12: Keep these page open, and open 7geese within a new tab/window.
- Step 13: Within 7Geese: At this point we need to get details from 7Geese, Login as an administrator and go to ‘Org settings’
- Step 14: Within 7Geese: Click on the integrations tab, press the configure button beside ‘Single Sign on’
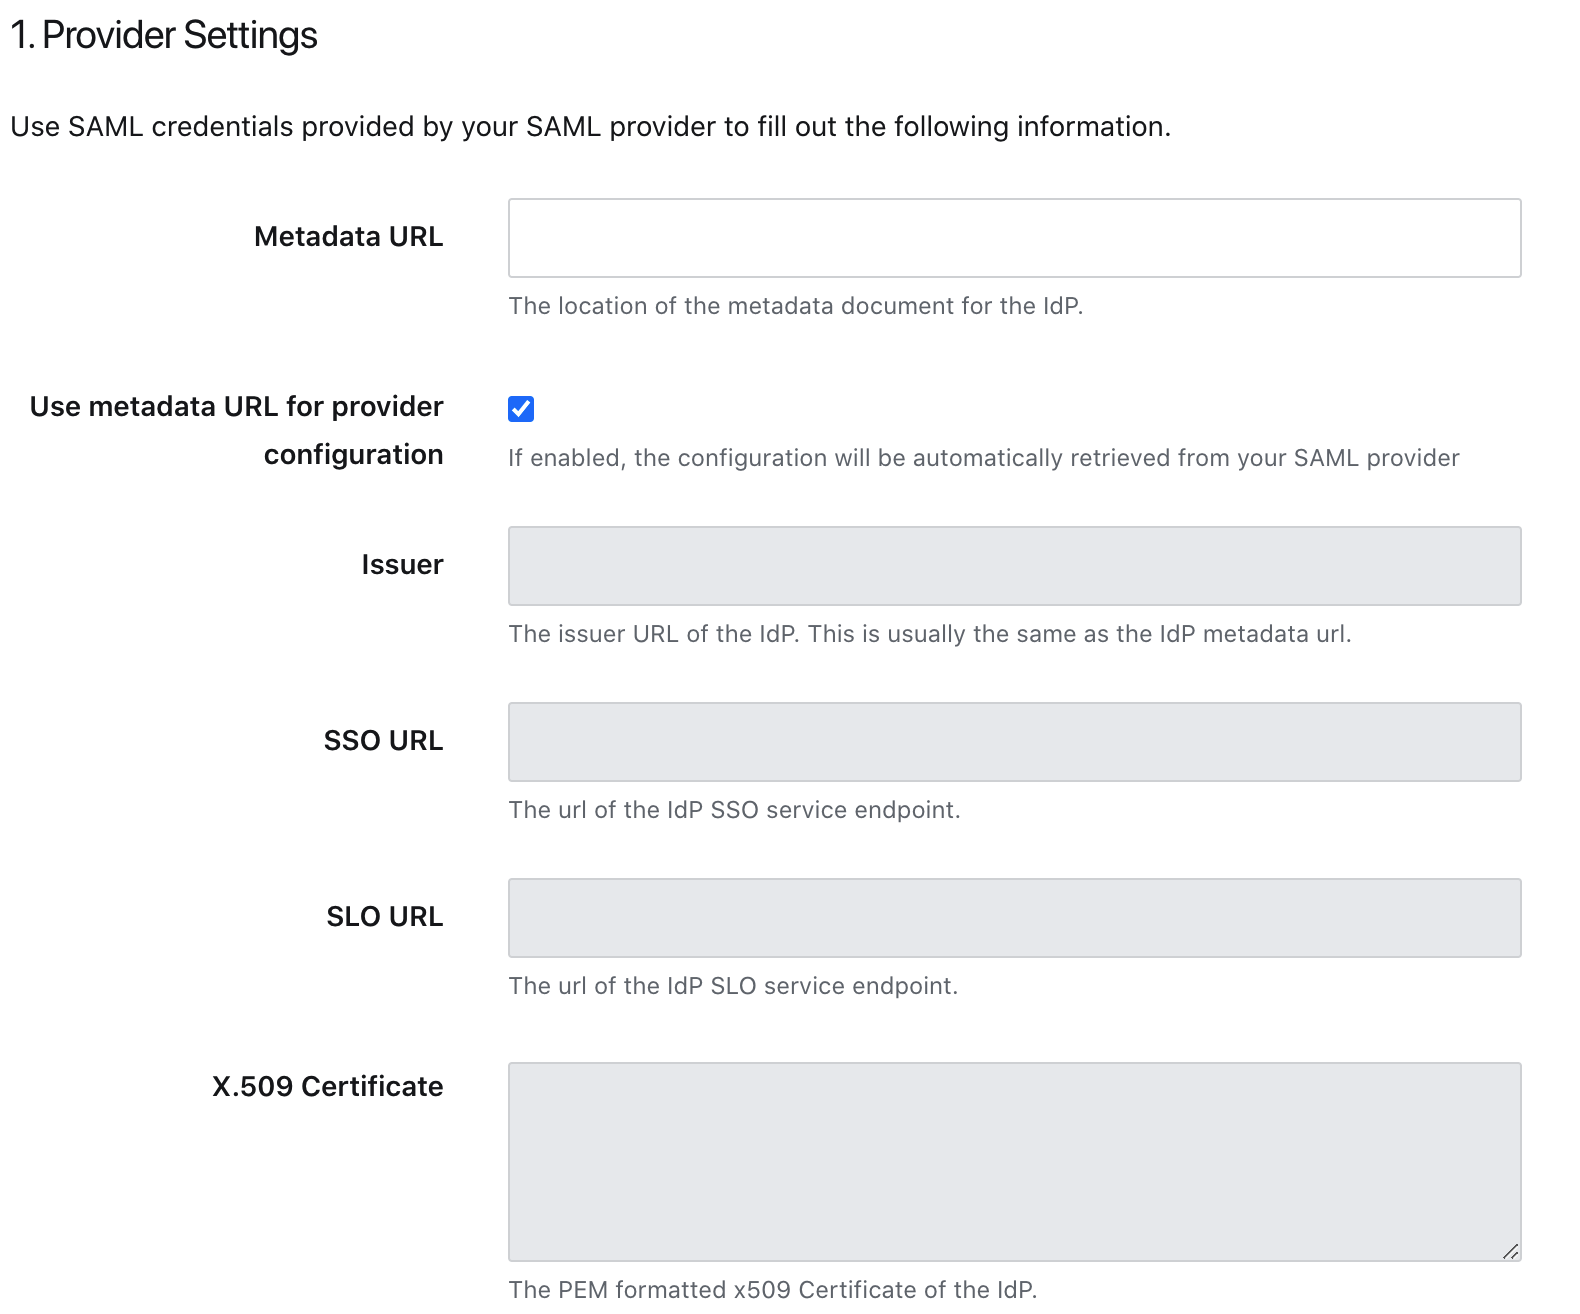
- Step 15: Add configuration from Active directory into 7Geese:
7geese: (Issuer) -> AD: Entity ID (e.g https://sts.windows.net/XXXXXX-XXXX-XXXX-XXXX-XXXXXXXXXXX/)
7geese: (Metadata URL) -> Same as above
7geese: (SSO URL) -> AD: SAML Single Sign on URL (e.g https://login.microsoftonline.com/XXXXXX-XXXX-XXXX-XXXX-XXXXXXXXXXX/saml2)
7geese: (SLO URL) -> AD: Sign out URL (e.g https://login.microsoftonline.com/common/wsfederation?wa=wsignout1.0)
7geese: X.509 certificate -> Open the previously downloaded .cer file in a text editor. Copy the contents in this field
Note: You can copy over the "App Federation Metadata URL". And use that in 7Geese in https://app.7geese.com/admin/saml/. That URL is the metadata URL and when you select the "Use metadata URL for provider configuration" checkbox we will download all the details. Click Save will update the details.
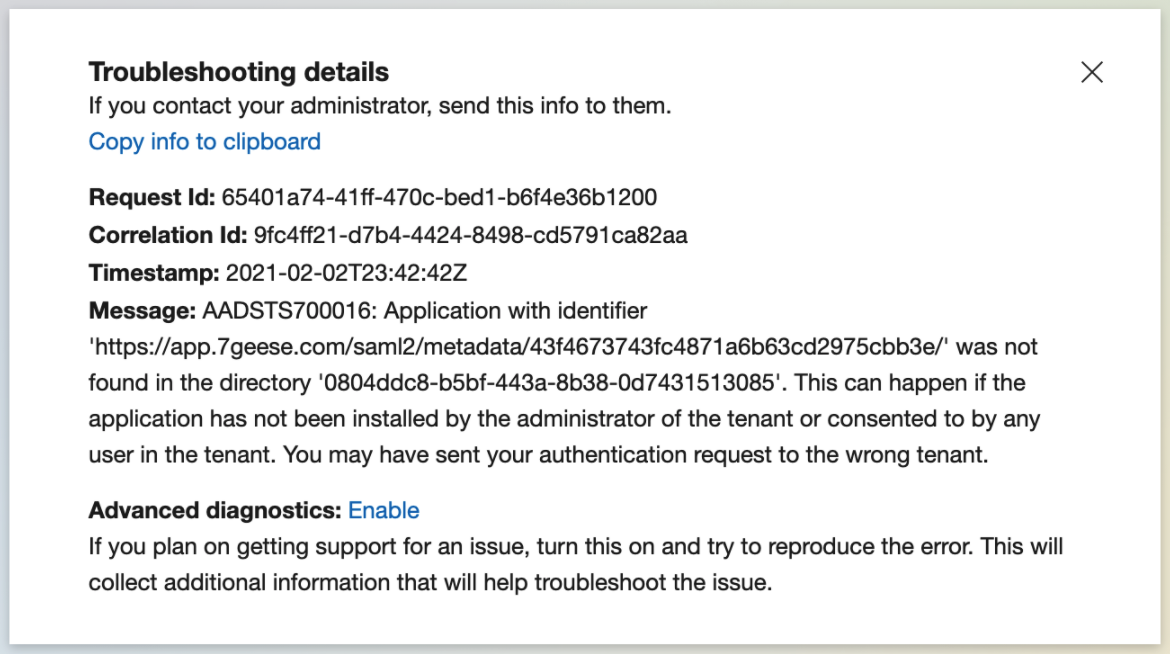
- Step 16: Click save settings. When testing SSO you may at this point get this error, because the URL on the Microsffot side still needs to be updated.
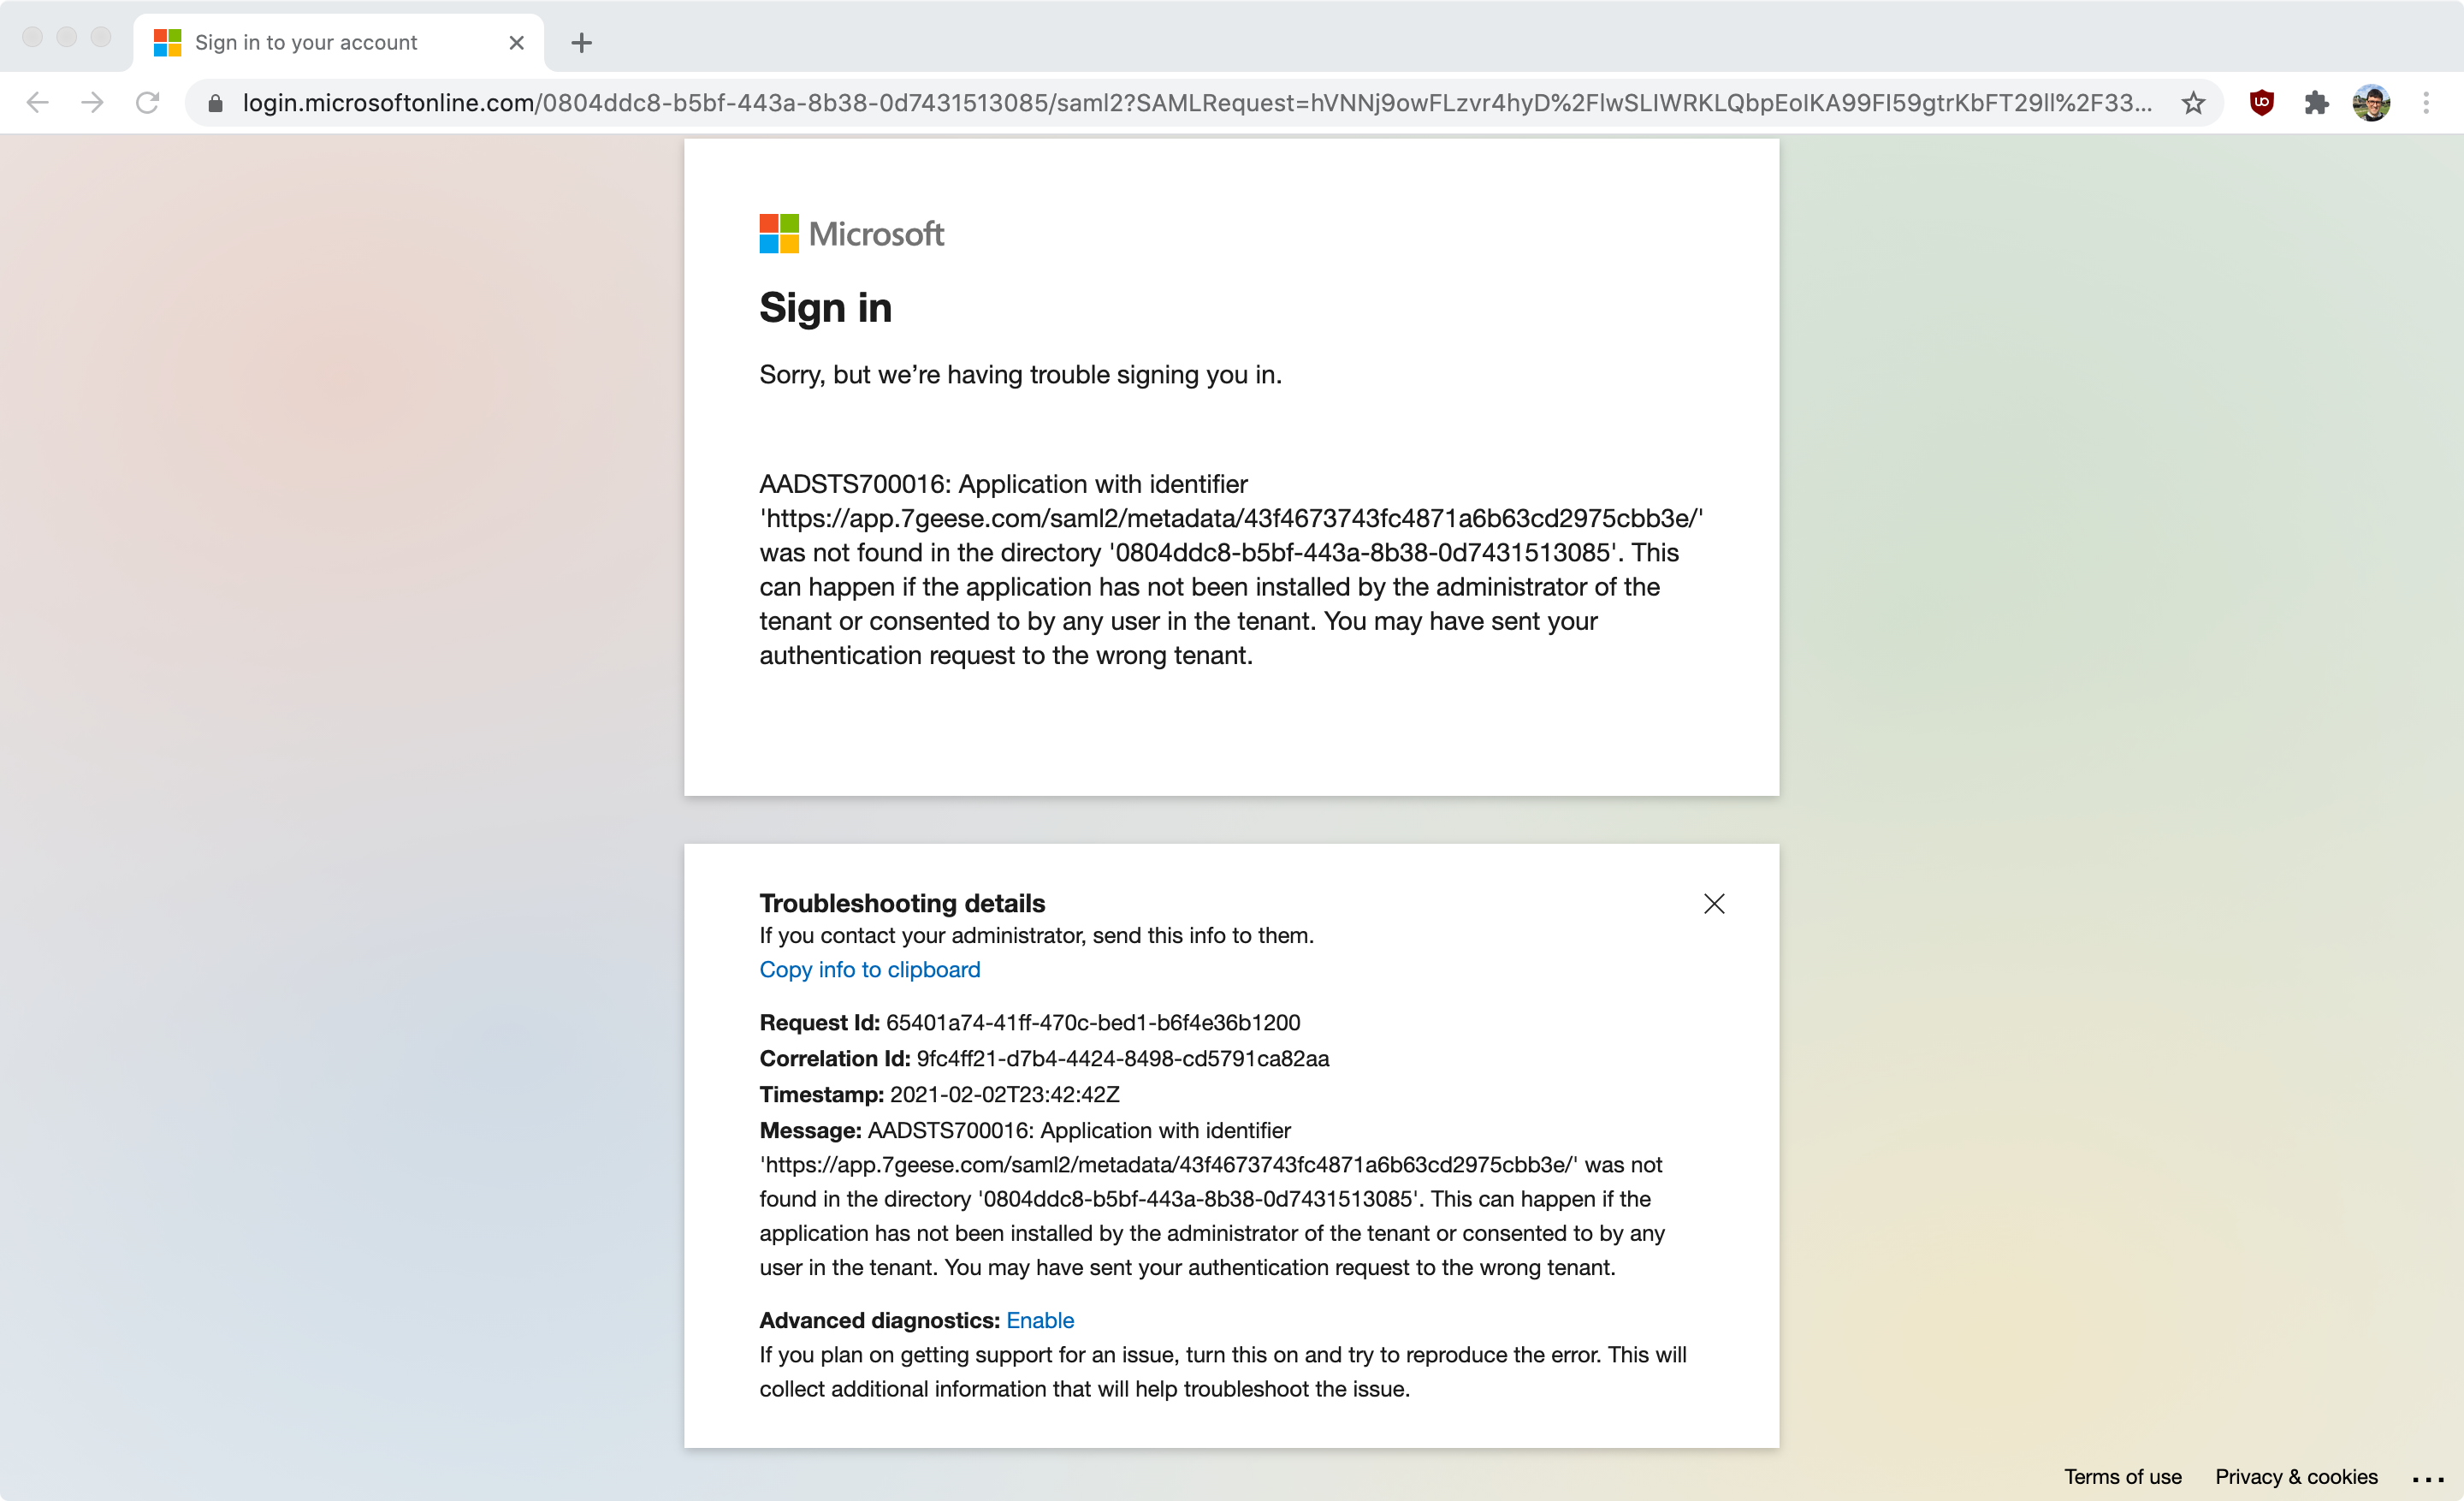
In this case, back in the Azure admin portal, fill out the 'Basic SAML Configuration' fields:
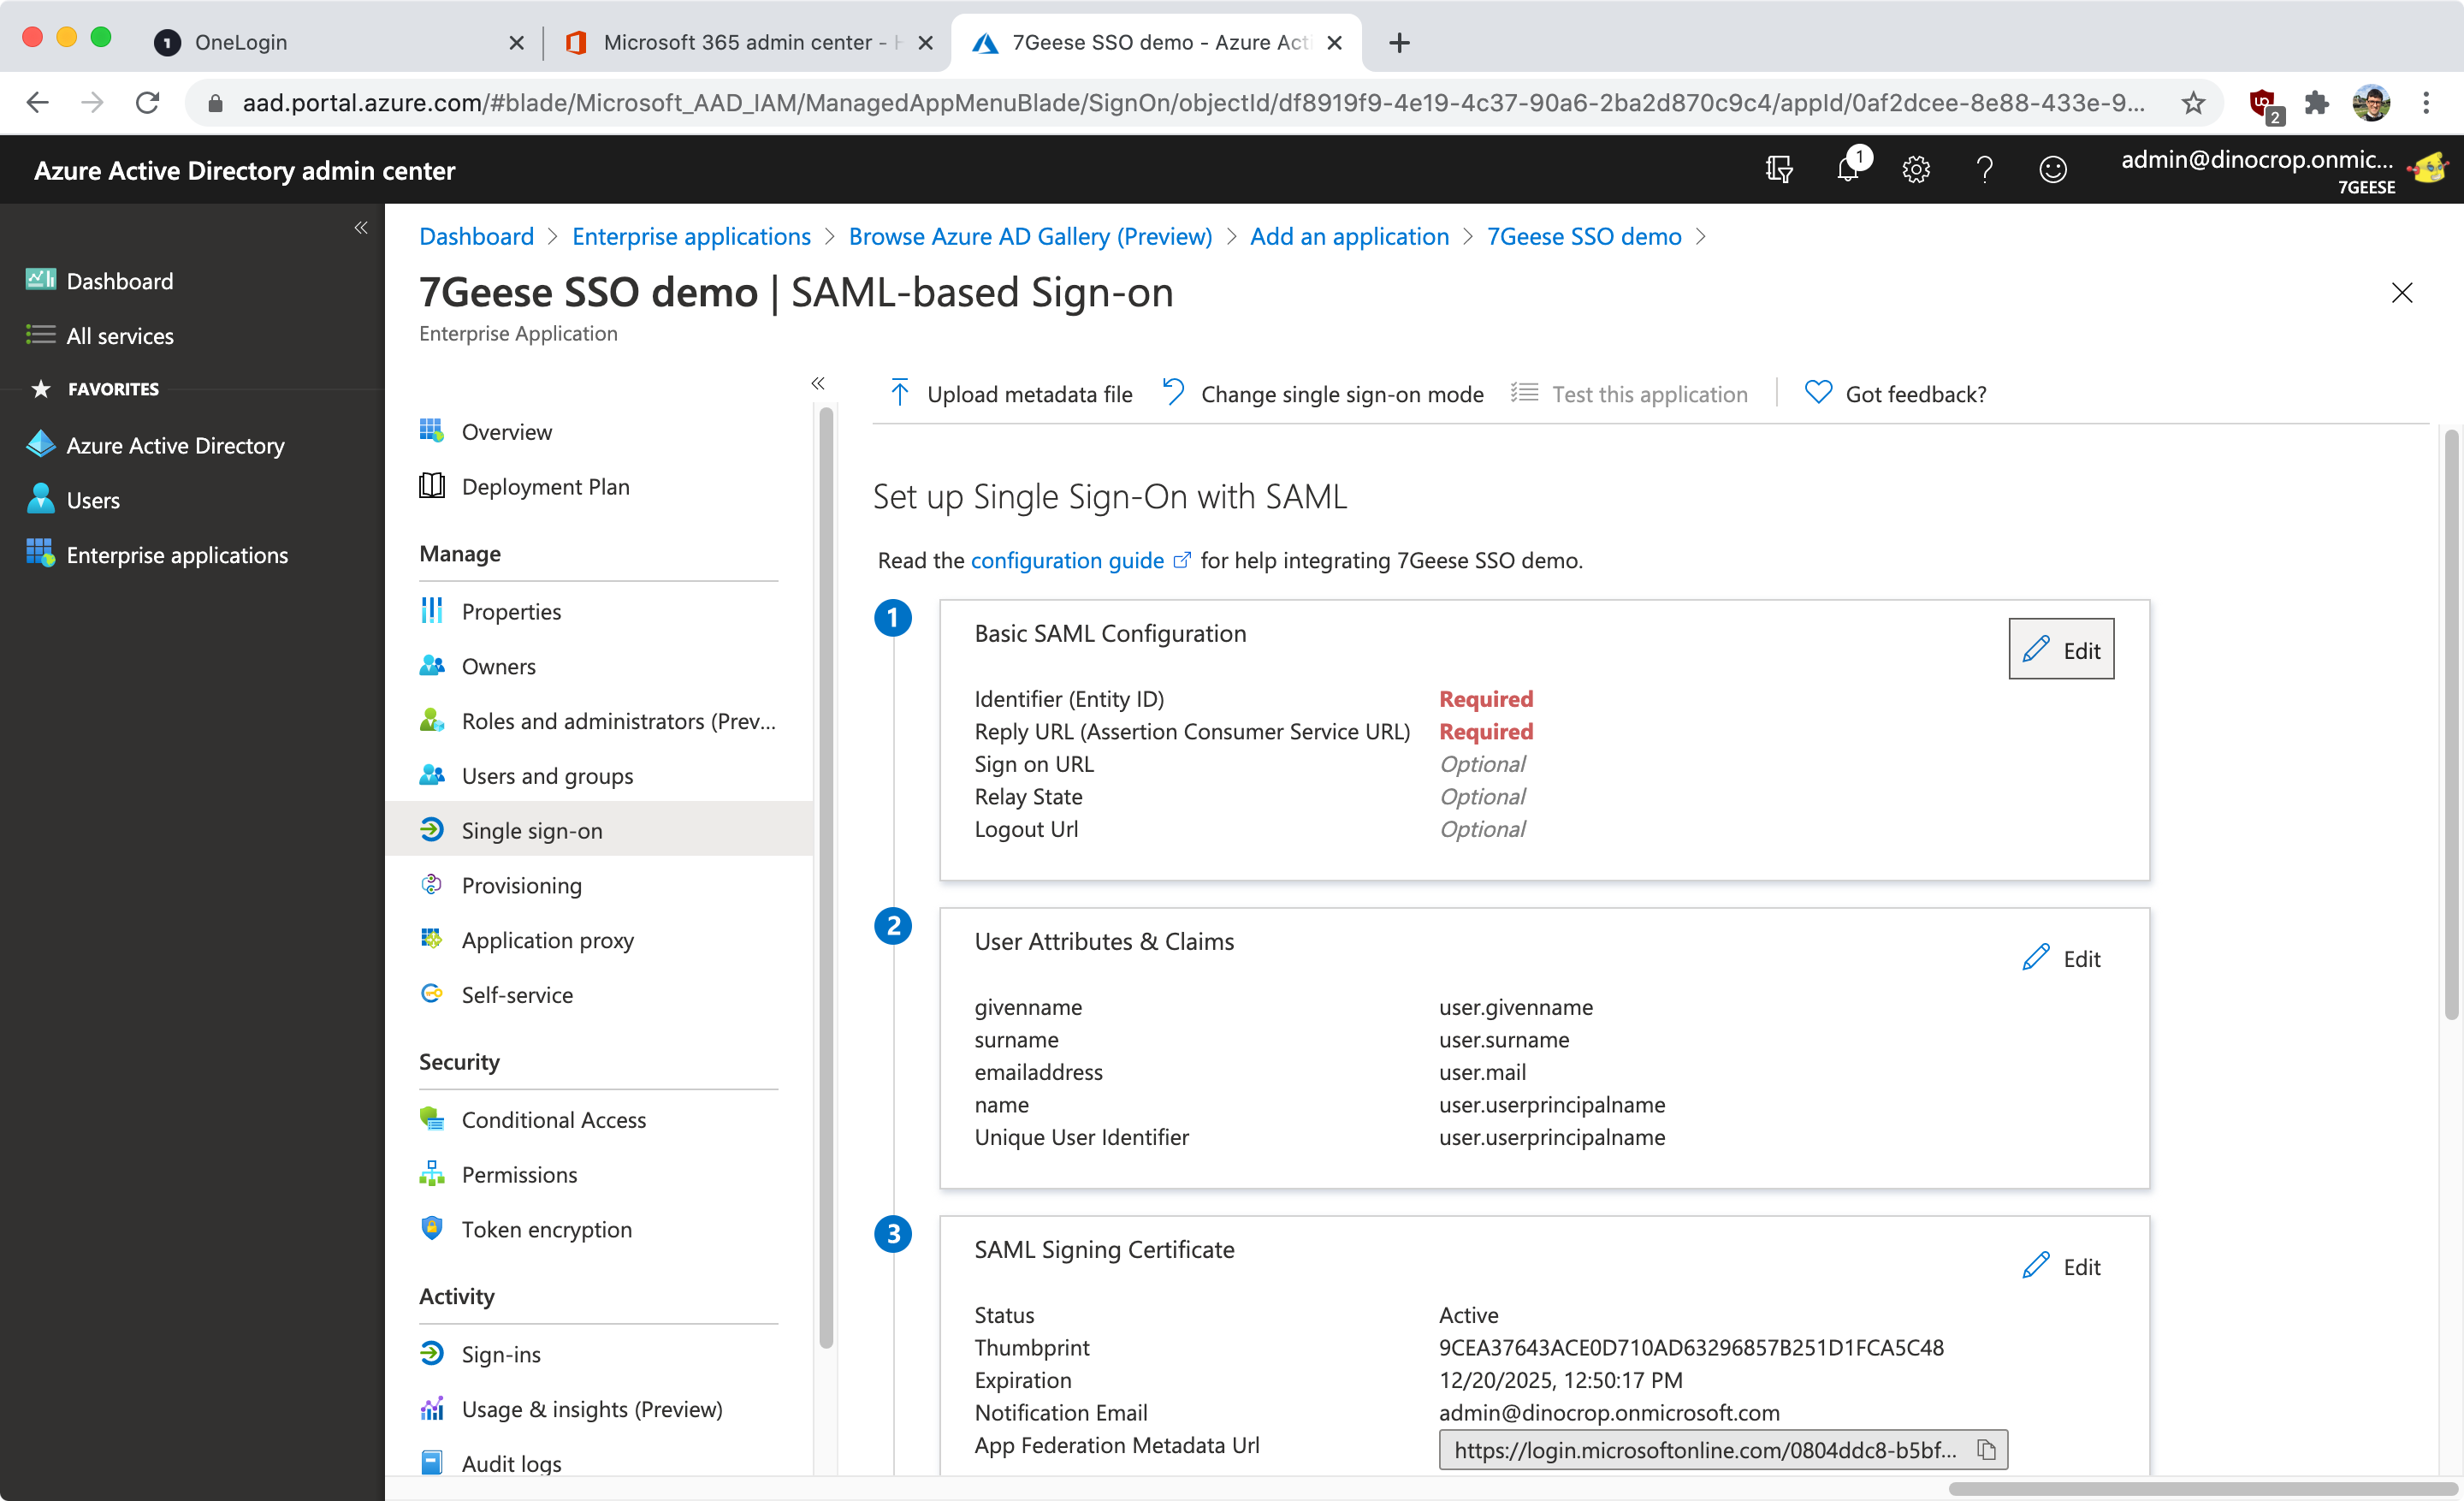
The Identifier is our Issuer URL, the "Reply URL" is called "SSO Service URL (Assertion Consumer Service)" in 7Geese. You can optionally fill in the "Logout Url".
- Step 17: Configure Active directory with 7Geese settingsAD: (Identifier) -> 7Geese Issuer (e.g https://app.7geese.com/saml2/metadata/XXXXXXXXXXXXXXXXXXXXXXX/AD: (Reply URL) -> 7Geese SSO Service URL (https://app.7geese.com/saml2/acs/XXXXXXXXXXXXXXXXXXXXXXX/
- Step 18: Click save settings in active directory page.
- Step 19: Wait a minute (configuration can take a moment to be read properly, then click ‘Test SAML’)
Note: Active directory will attempt to login with the current user. This user might have an email address with the suffix .onmicrosoft.com. If this is the case, 7Geese will prompt that the user is not registered in the network (all same users must be previously configured in 7Geese before single sign on will work for them).
- Step 20: From 7Geese, click ‘test logging in'. You might still get an error - our team had to assign our test users in the "Users and groups" tab before they had enough permissions in Azure AD to use the application.
- Step 21: If everything has worked, press Enable SAML on the 7Geese configuration page.
Frequently Asked Questions
Q: What happens once SAML is enabled?
A: After SAML is enabled, users will need to type their email address in the application’s login page and hit Enter (or click the arrow). We recognize that email is part of a network with SAML enabled and use SAML credentials to give you access to the application.
Q: Why do I still need to enter my email, shouldn’t I get automatically logged in?
A: SSO means that you don’t need to remember a separate login password for the system to recognize and authenticate you. The process must still be initiated by entering your email address in the login page first so we know who you are and what to do next.
Q: I have set-up the SAML but I received an error message? What does it mean?
A: In the error message you receive you will find Troubleshooting details:
The message section will outline what has been logged or not happening as expected. The first step to troubleshoot errors is to go to the Organization settings > Integrations > SSO Configuration and enable the “Use metadata URL for provider configuration” to allow the SSO to re-authenticate the SAML integration.
If this does not resolve the issue, you can reach out to our support team to troubleshoot further.
Q: Can we connect multiple Microsoft Active Directory, Office 365 / Azure instances to the application?
A: No, currently the integration is only set- up to connect to one instance and one email account domain.

