Please note: This article only applies to standalone customers (7Geese), it does not apply to those who are integrated into the broader Paycor HCM platform. Click the link if you're based in the US and want to learn more.
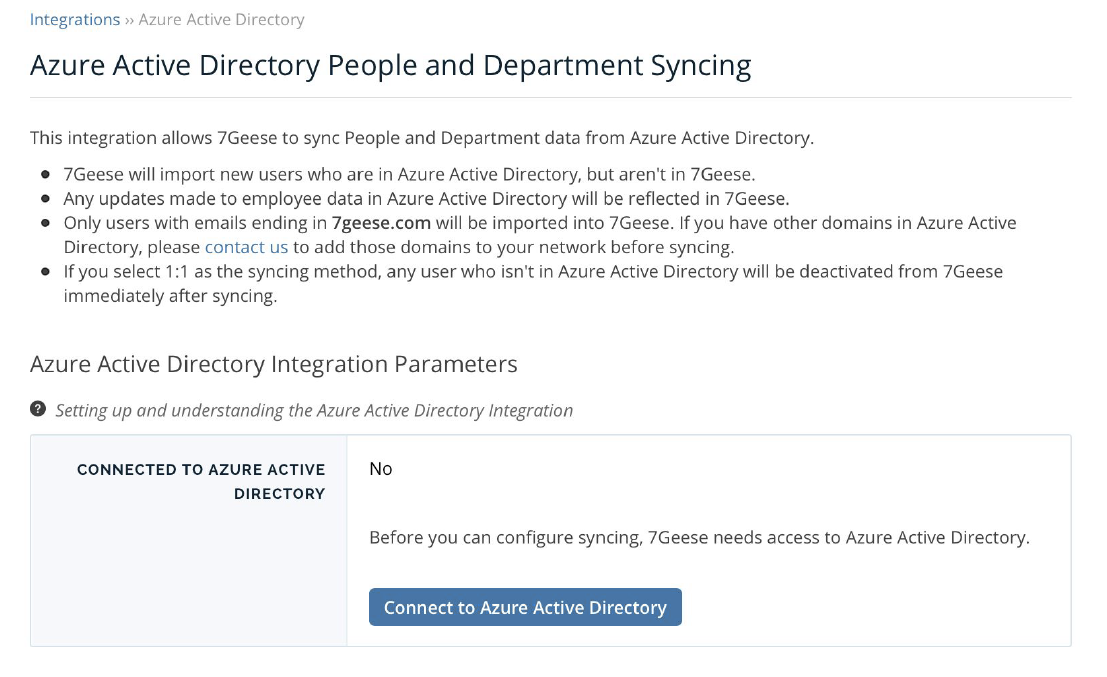
If you’re logged in as an admin user, you can go to Organization Settings > Integrations > Azure Active Directory to set-up as the sync.

Click on “Connect to Azure Active Directory”, you will be redirected to login to your Microsoft account and grant access to your Active Directory data (NOTE: you’ll need admin permissions).
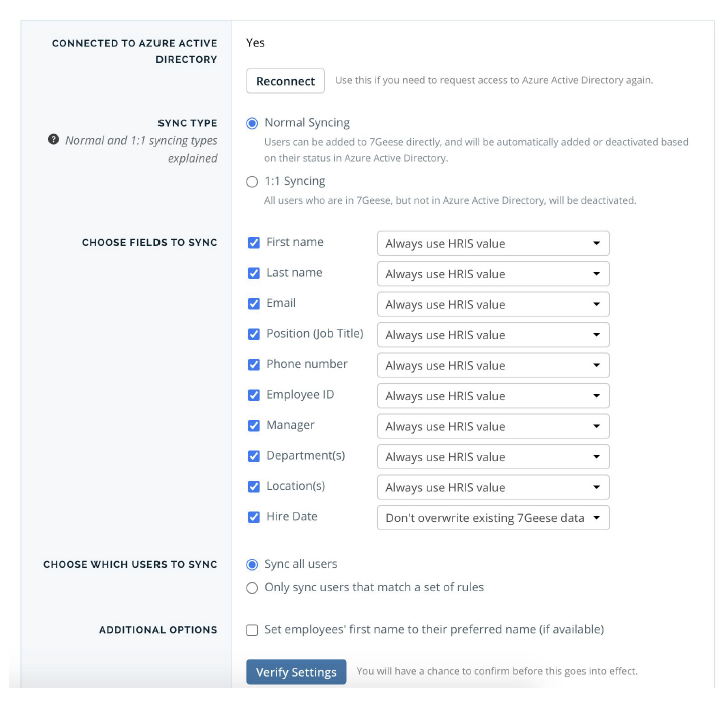
You will be redirected back the application but the integration will be updated so you can choose the field to sync:

You can choose which fields you want to synchronize and whether there are users you don’t want synced. Once you’ve made any necessary changes, you can click Verify Settings.
You should be careful that you only sync fields which actually have the data you want in Azure (for example, if you don’t track users Title in Azure, you should disable that field from the sync, or at least change it to not overwrite existing data).
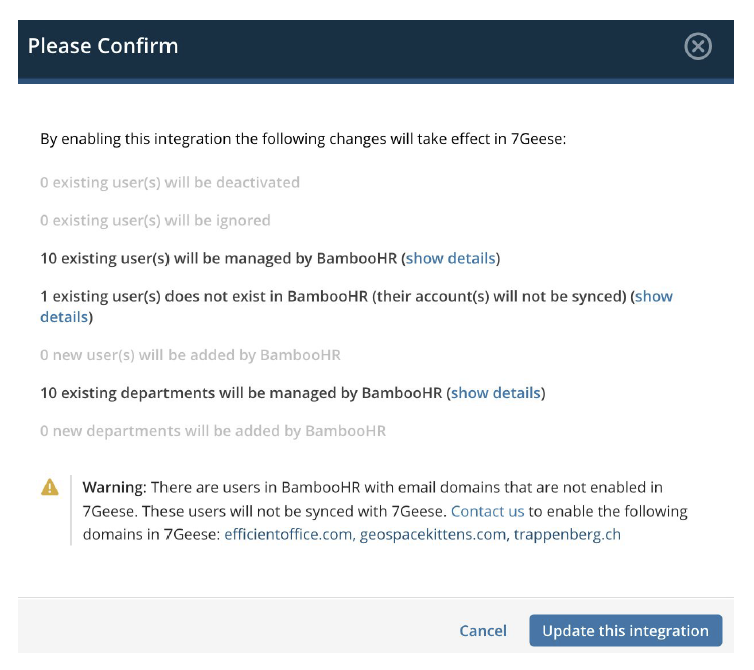
When you click verify, it will bring up a confirmation dialog:

The “Show Details” link will give an expanded view of which users will be added, deactivated or just synced if they already exist. You can use those lists to make sure the syncing process isn’t going to do something unexpected (like deactivate a large number of users, or add a bunch of users you don’t want, etc..).
Push cancel to make more changes. When you confirm the dialog it will initiate a sync immediately, and then continue syncing 7Geese with Azure once an hour.
