Please note: This article only applies to standalone customers. This article does not apply to those who are integrated into the broader Paycor HCM platform.
This guide is an overview of information related to getting your 7Geese organization ready using Namely as an HRIS. It will cover how to setup the integration.
Namely: Finding Your API Key
Once you've readied your data you are ready to begin setting up the integration.
In your Namely Portal, you will need to get the following information:
- Your company's Domain
This is the custom domain that your custom Namely website is at. If the website you use is https://example_name.namely.com your domain is 'example_name'.
- An API key
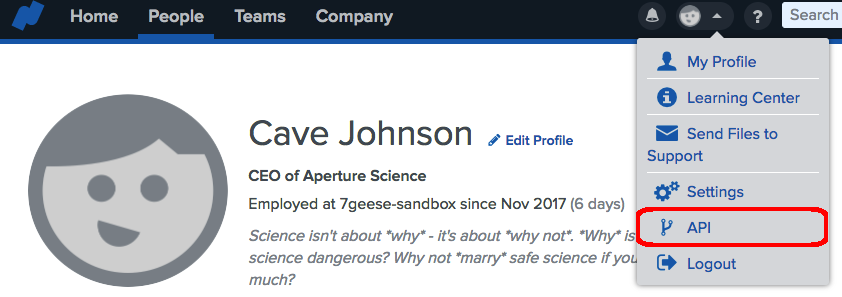
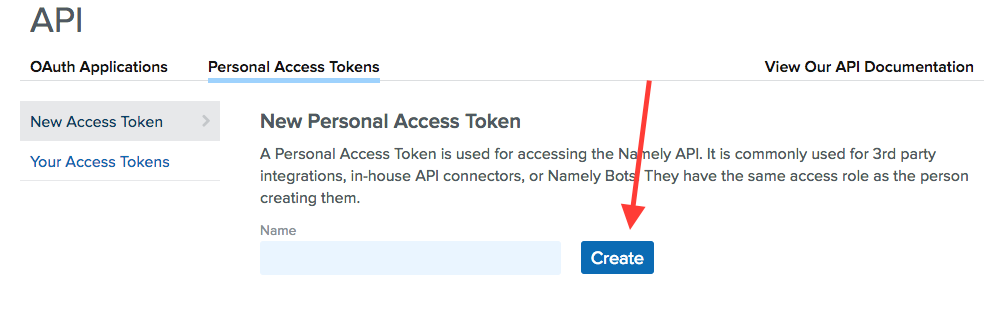
To obtain an API key in Namely, select your profile icon on the top navigation bar, and select API. If it's not there, you may not have sufficient permissions to retrieve an API key. On the following screen select, 'Personal Access Tokens', and then press 'Create' to generate the API key needed.

And then,

Configuring Namely in 7Geese
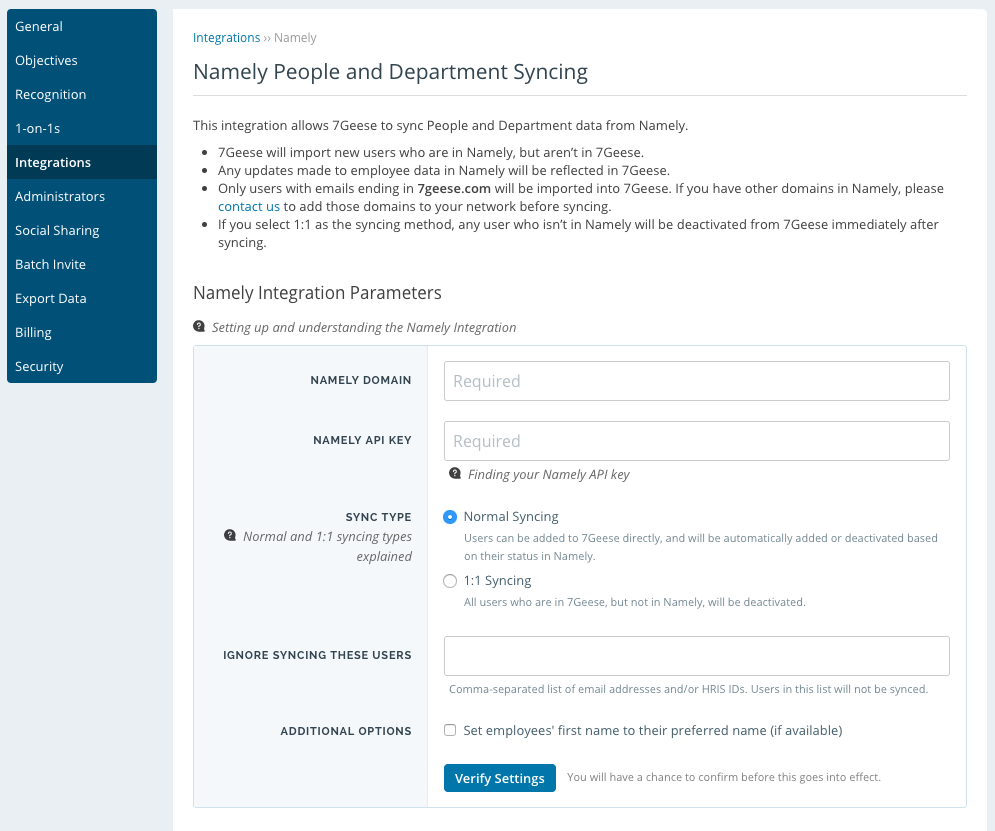
Once you've collected these two pieces of data, head over to the Integrations page in 7Geese via Organization Settings. Here you can get started configuring the Namely integration. Enter the domain and API key next to NAMELY DOMAIN and NAMELY API KEY respectively.

Replace First Names With Nicknames
If your team prefers to use their nickname instead of legal first name, simply check off the option before verifying and if there is a preferred name in Namely, 7Geese will automatically replace the first name! If no preferred name is provided in Namely a user's first name will remain the default first name listed in Namely.
User Import Verification
After you've clicked "Verify Settings", you will be prompted to ensure that everything is correct before turning on the integration. Scan through the information and simply select "Enable this integration."
If you need to disable the integration at any time, any information stored in 7Geese that's been pulled from Namely will be kept.
